Craft Corner-idées pour travaux manuels

Crafting with Mortimer
Bonjour aux petits et grands fans de crafts! Aimez-vous couper, coller et peindre? alors, vous êtes au bon endroit! Morty, Betty, Malcolm et Godfrey ont toujours de nouvelles idées pour vous faire fabriquer des choses étonnantes.
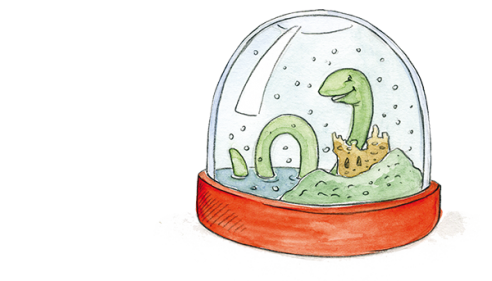
Craft of the month: Do-it-yourself snow globe
That’s what you need
- A clean jam jar
- A small figure
- Deco confetti, artificial snowflakes, pearls, glitter…
- Liquid glycerin (available at the pharmacy), baby oil or washing-up liquid
- Water
- Water-proof glue
By the way: Uncle Godfrey has seen a lot of real snow in his trip to Alaska.
And that’s how it works
Pick up the lid of the jam jar and glue the figure to the middle of the inside. Let the glue dry. Now fill the jam jar with water, nearly to the edge and add a few drops of glycerin, baby oil or washing-up liquid (this helps to have the snow float longer). Fill the glass with snow and glitter. Screw the lid on the glass to test whether there is enough water and snow in it. In case there are big air bubbles fill in more water. When you’re finished, seal the glass with plenty of glue and let it dry. Now your snow globe is done!
Christmas characters
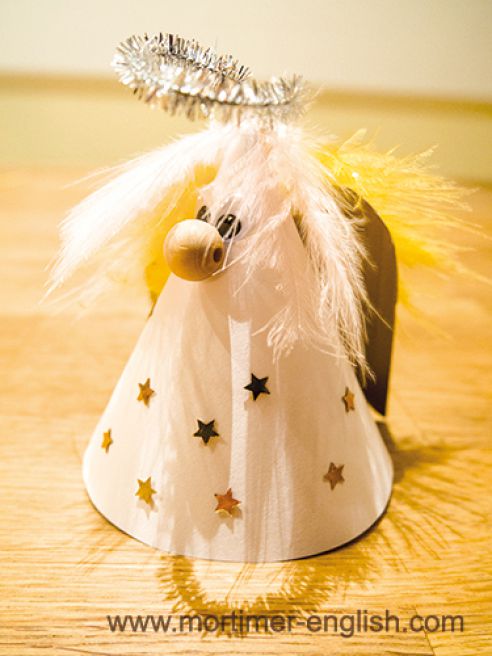
Today we will show you how to create many different Christmas characters, and even an Uncle Godfrey, from a simple, cut out semi-circle.
You can download a detailed tutorial with pictures and stencil templates here. (The PDF file has a size of approx. 1,7 MB.)
For crafting you need
- paper in different colours (construction paper or another heavier paper)
alternatively craft felt - scissors, glue, pencil
For decorating:
- wiggly eyes
- wooden beads for the nose
- wool, cotton wool or feather for hair and beard
- pipe cleaner and tinsel in different colours and styles
- sequins and other glitter effects for decoration
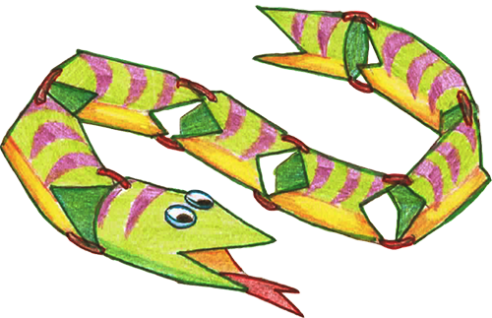
Craft: jungle snake
That’s what you need
6 toilet paper rolls or more
pipe cleaners
Brush and colours,
for example acrylic colours
Googly eyes
A small piece of red craft paper
Hole puncher
Glue
By the way: Uncle Godfrey had a funny
adventure in the jungle where he also
met a snake.
And that’s how it works
At first, colour the paper rolls in any way you like: A red snake with yellow-blue dots or chequered in green-violet? Everything is possible! It looks especially nice if you also paint the insides of the rolls. Let the paint dry and cut the tips of the rolls to a point at each end. But keep one end of the tail and head rolls straight.
Now punch a hole in each tip and also into the straight ends of head and tail. Cut out a forked tongue from the craft paper and glue it into the mouth of the snake. It also needs the googly eyes of course!
Cut the pipe cleaner to a length that allows you to connect two rolls and stick it through the holes. Now bend the ends of the cleaner so that they can’t fall out of the holes and you’re done, your snake is finished!
Self-made playdough
You can easily make your own dough. It keeps for many weeks when it is stored in a sealed plastic container.
And that’s how it works
1. Mix together flour, salt and tartaric acid.
2. Add water with oil and food colouring dissolved in it.
3. Knead it together. Please pay attention: the pastry is hot! It may take a few minutes for the dough to form.
You can use playdough on any washable surface. For young children, a chunk of dough the size of a tennis ball is good to start with. Fingers are the best molding tools for the children to use. To clean up play dough, get rid of any dry, crusty pieces. Use a scraper to scrape off your work surface.
That’s what you need
300 g flour
150 g salt
300 ml hot water
2 table spoons oil
2 tea spoons tartaric acid
(The tartaric acid is a harmless desinfectant and preservative.)
food colouring
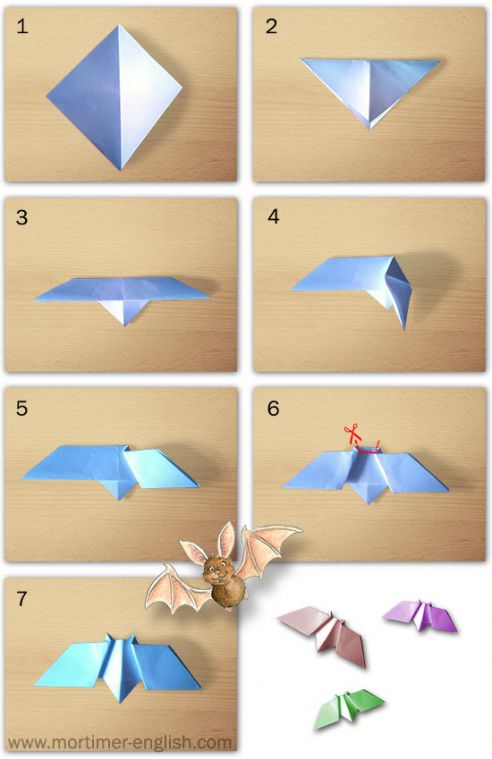
Not only for Halloween: Make Betty happy and craft origami bats!
Betty is always happy to see all the great bat-themed decorations that people put up for Halloween – even if she always emphasises that bats are not spooky at all. To ensure that you have many, many bats fluttering about at home for decoration and as presents for friends, we have prepared an easy-peasy tutorial for you. All you need is a square piece of paper and a pair of scissors.
And this it how it works
1. Fold the paper diagonally in the middle.
2. turn around the sheets and fold diagonally once more.
3. Fold down the upper part of the sheet.
4. For the first wing, fold one half forward diagonally.
5. Afterwards, fold back the wing so you get an edge.
6. Do the same on the other to make the second wing. Now you need the scissors: Cut out a small portion of the paper betwenn the two edges so you get the pointy bat ears. You’re done!